


Texturing in Blender,
will make your models slicker
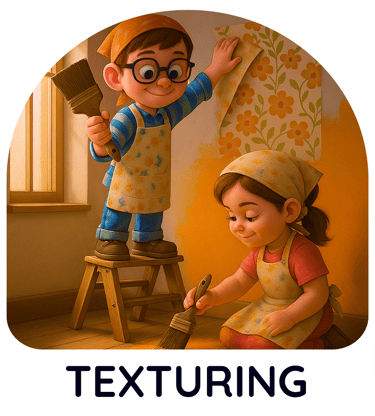
Texturing 1.1 Its more than just slapping images
Discover the power of Blender's texturing capabilities! This video demonstrates how texturing nodes can create dynamic, animated textures using nodes in the shading editor. Here know that you can generate effects like flowing water on a simple plane, adding surface detail and undulations with bump and noise nodes. Animate your textures for realistic motion, control flow direction and scale, and even transform a torus into a glass-like object with flowing distortions.
See how understanding texturing unlocks incredible creative potential in Blender, even with basic geometry.


Texturing 1.2 Slots and material browser
This comprehensive Blender video demystifies the powerful Material Slots and Material Browser features, essential for efficient 3D texturing. Learn to assign diverse materials to a single object using Material Slots, ensuring intricate detail. The video demonstrates how to utilize the Material Browser to select pre-existing materials within your file, streamlining your workflow. Discover the crucial "Fake User" function, preventing accidental material deletion upon saving and reopening files. Understand Shared Materials and how to make them unique, giving you precise control. Finally, explore Pinning Materials for persistent visibility in the browser, enhancing productivity.
This guide is perfect for animators and 3D artists seeking to optimize their Blender material management and beginner as well.
Surface Your Creations:
Mastering Texturing in Blender
Bring your 3D models to life with vibrant detail and realistic surfaces through Blender's comprehensive Texturing tools.
Applying textures is a crucial step in the 3D pipeline, allowing you to define the color, reflectivity, roughness, and
other surface properties of your objects. Blender offers a flexible and node-based system for creating and
manipulating textures, empowering you to achieve a wide range of visual styles, from photorealistic materials to stylized artistic finishes.
Begin by exploring various types of textures, including image textures for applying pre-made patterns and details,
procedural textures generated algorithmically within Blender, and brush-based texture painting directly onto your 3D models.
Understand the role of UV unwrapping in mapping 2D textures onto your 3D surfaces, ensuring accurate and distortion-free application.
Dive into Blender's powerful node-based material system to build complex shaders that combine multiple textures and properties.
Layer different textures, blend them using various mixing nodes, and control their influence using masks and procedural patterns.
This non-destructive approach allows for intricate and highly customizable material creation.
Explore the world of procedural textures, generated mathematically within Blender.
Create patterns like wood grain, marble, noise, and weaves without relying on external image files.
Procedural textures are resolution-independent and offer endless possibilities for customization and animation.
Get hands-on with Texture Painting, directly applying colors and details onto your 3D models using a variety of brushes.
This intuitive approach is ideal for adding organic details, weathering effects, and custom artwork directly onto your surfaces.
Utilize layers and masking within the Texture Paint mode for precise control and non-destructive editing.
Understand the importance of texture maps beyond just color. Utilize maps for controlling surface properties like roughness (glossiness),
metallicness, normal and bump (for simulating surface detail), and displacement (for actually deforming the geometry based on a texture).
Combining these different map types allows for incredibly realistic and nuanced material creation.
Mastering Texturing in Blender is essential for adding visual richness and believability to your 3D creations.
By understanding the principles of UV unwrapping, exploring different texture types, and
harnessing the power of Blender's node-based material system and texture painting tools,
you can transform your basic models into visually stunning and engaging assets.
Texturing 1.3 Metallic Parameter
This Blender tutorial demonstrates how to create a rose gold metallic material and explores various rendering options within Blender. The video contrasts the built-in reflections in Cycles with the faster Eevee engine, highlighting that Eevee requires light probes for accurate reflections.
You'll learn how to add and precisely position reflection probes for different objects like spheres and cubes. The tutorial also covers optimizing Cycles render settings by adjusting glossy light paths to prevent unwanted blackness in reflections. Finally, it briefly introduces ray tracing in Eevee as another method for achieving reflections, noting its performance considerations. This video is ideal for anyone looking to create realistic metallic materials and master Blender's rendering capabilities.


Texturing 1.4 Roughness Parameter
This Blender tutorial explains the "Roughness" parameter in the shading tab and its significant impact on material appearance. The roughness value directly influences how light reflects off a surface. Lower values create smooth, highly reflective surfaces, while higher values result in rough, diffuse finishes.
The video details how this parameter affects other crucial material properties. It influences specular highlights, dictates the transition to a metallic look, and changes the appearance of transmission for glass-like effects. Furthermore, roughness plays a role in anisotropy, allowing for the creation of directionally roughened surfaces. Adjusting roughness is essential for achieving a wide range of realistic and stylized textures in Blender, enabling everything from highly polished objects to rough, uneven finishes.
Texturing 1.5 IOR (Index of Refraction) Parameter
This video explains how to use the Index of Refraction (IOR) to create realistic material reflections and refractions. The video demonstrates adjusting the IOR value in the Principled BSDF shader to control how light bends when entering and exiting a material, significantly impacting its appearance.
Key aspects covered include locating and adjusting the IOR setting, understanding how different IOR values simulate materials like water or glass,
for accurate reflections based on viewing angle.
The video also explores combining IOR and Transmission settings to create transparent, refractive materials and shows the visual impact of IOR changes on a 3D sphere. This guide is ideal for Blender users aiming to enhance their texturing skills and achieve photorealistic renders.

Texturing 1.6 Alpha Parameter
This video demonstrates various texturing techniques in Blender 1.6 Alpha. The video begins by showing how to add a material and import an image texture to a plane, adjusting its alpha for transparency. It then explores texture painting, which can be taken advantage to paint directly onto the 3D object. The tutorial further covers creating an emissive texture by adding a new plane, applying a material, and using an image texture for the emission color and strength.
Finally, you can use texture paint for emission, allowing direct painting of glowing areas. This video is ideal for Blender beginners looking to understand fundamental of alpha texturing workflows, including image textures, transparency, and texture painting for both color and emission.

Texturing 1.7 Normal Parameter
This video explores the powerful capabilities of normal maps and bump maps for adding intricate surface detail without increasing polygon count. The video demonstrates how normal maps, which are image textures, can create the illusion of depth and complex geometry on simple flat surfaces, significantly reducing computational load. The video explains how to use a normal map node in Blender's shader editor, emphasizing setting the color space to "non-color" for accurate results. For black and white textures, it shows how a bump map node converts height information into normal data, creating uneven surfaces. The video also illustrates how to animate texture properties like scale and movement using the mapping node, enabling effects such as flowing water. Poly Haven is recommended as a source for high-quality textures, including normal maps in various formats. By leveraging these techniques, users can achieve highly detailed and realistic 3D textures efficiently.


Texturing 1.8 Subsurface Parameter
This video deeply explains Subsurface Scattering (SSS), vital for realistic material rendering. SSS is the effect where light enters an object, scatters internally, and exits elsewhere, crucial for lifelike skin, wax, or marble. Using an object, the video demonstrates how adjusting the "Subsurface" parameter creates organic realism. It details key SSS parameters: Subsurface Radius controls light's travel distance and color; Subsurface Color dictates the scattered light's hue; and Subsurface Anisotropy influences scattering direction.
Texturing 1.9 Specular Parameter
This video explains difference between GGX and Multi-scatter GGX, highlighting their impact on rendering quality and speed. GGX offers faster results but with some information loss, making materials appear darker. Conversely, Multi-scatter GGX provides more accurate and visually pleasing renders, though it requires longer processing. The video also explores the IOR (Index of Refraction) level, demonstrating its control over reflection visibility at various angles. Furthermore, it covers the Tint option for coloring reflections and the Anisotropic and Anisotropic Rotation settings for simulating rough surfaces and managing reflection patterns. The presenter advises using GGX for quicker workflows and Multi-scatter GGX for final, high-quality renders.

Texturing 1.10 Specular Parameter
This video dives into the powerful "Transmission" setting within Blender's Principled BSDF shader, crucial for creating stunningly realistic transparent materials. Learn to effortlessly craft glass, water, and gems with incredible visual fidelity.The video highlights essential steps: properly setting up an HDRI environment for accurate lighting and understanding the key differences between Eevee and Cycles render engines. For Eevee users, enabling "Ray Traced Transmission" is vital to achieve visibility through transparent objects. Discover how object smoothness impacts refraction quality, and explore diverse applications from shimmering liquids to vibrant gemstones like rubies and emeralds. Master the Transmission parameter to elevate your 3D renders with captivating realism.

Texturing 1.11 Coat Parameter
Unlock advanced Blender texturing by mastering the Coat parameter within the Principled BSDF shader to give 3D objects a realistic, dual-layered look, like car paint or an epoxy finish. This tutorial covers crucial controls, including Coat Roughness for surface smoothness, adjusting IOR to simulate materials like glass, and using Coat Tint for custom colors. Crucially, you'll learn to connect a Noise Texture and Bump node to the Coat Normal input to create intricate surface details, like a golden foil effect, exclusively on the coating layer, enhancing your 3D modeling and shading results.

© Copyright 2024 Pranay Vaidya.
All rights reserved.