One small click, will make the site slick - Help us, help you - Donate - (This site is continuously under construction)
Modeling Section

Switch to Edit Mode, and watch your art explode!
Use Tab to switch to edit mode, for further editing the mesh according to your requirement. After entering edit mode you can switch to different modes like,
1 - Vertex Mode
2 - Edge Mode
3 - Face Mode
Bevel


15. Sharp to soft, bevel it off.
Use Ctrl + B to create a bevel, for more segments use the Scroll Wheel and move the mouse the increase or decrease the bevel
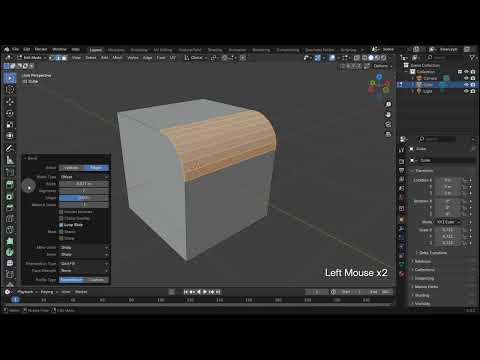

15.1 With V under the hand, bevel the edge of vertex on demand
After activating the bevel tool, use V to switch from beveling the edges to vertices
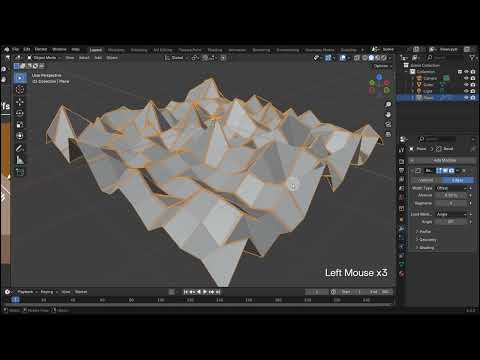

15.2 Different width types, gives different vibes
The Width Types options allows you to bevel a part of the object based on the our requirement
1 - Offset - This defines the distance from the corner
2 - Width - This defines the width of bevel
3 - Depth - Its length from the corner to the beveled face
4 - Percent - Amount of bevel based on percentage
5 - Absolute - Some times a life save


15. 3 Push or pull to make it cool
With the help of shape option you can change the curvature of the bevel to convex or concave
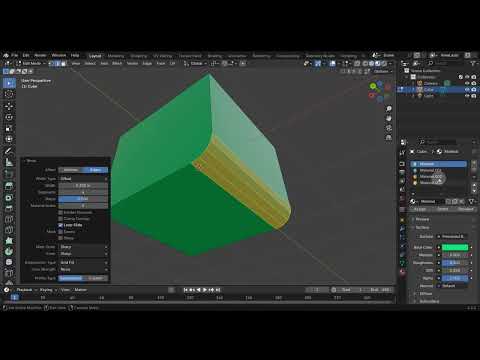

15. 4 Bevel sharp or wide & let the colors ride
With the help of Material Index option we can color directly while beveling


15. 5 Harden strong, shading’s on
After activating the bevel tool, use Harden Normals to control the shading of the beveled faces by either making it smooth or sharp shaded


15. 6 Stop the spread, keep it clean instead
With the help of clamp you can avoid the overlapping and intersection of the edges


15. 7 Slide or stay, choose your way
Using the loop slide tool you can make the beveled edges to be of same distant from each other


15. 8 Hit the mark, let the system embark
Mark Seam and Mark Sharp will allow you to automatically set the new seams and new sharp edges, without your personal involvement


15. 9 Bevel miter outer, make it shine, make it finer
This control the look or for that matter the flow of the edges at the inner bevel corner


15. 10 Bevel miter inner - keeps the bevel sleek and shimmer
This allows us to control the look or for that matter the flow of the edges at the outer bevel corner


15. 11 Perfect bevels, no deep cuts, you can use the miter shortcut
After activating the bevel tool,
use O to switch between different outer miter modes,
use I to switch between different inner miter modes


15. 12 Cut with grace, keep the pace
Intersection allows you to have different ways of filling up the corners


15. 13 Set the weight, bevel it great
Using the Face Strength option along with Weighted Normals modifier you can get smooth bevel corners with minimum bevel segments


15. 14 Steep or low, set the Profile flow
By setting the profile shape you can design the shape and flow of the beveled part, (make sure to give enough segments to see any visible changes)
Inset


16 Inset a face, shrink with grace
By clicking I, you activate Inset Tool, Inset Tool allows you to create a small duplicate face of the selected face
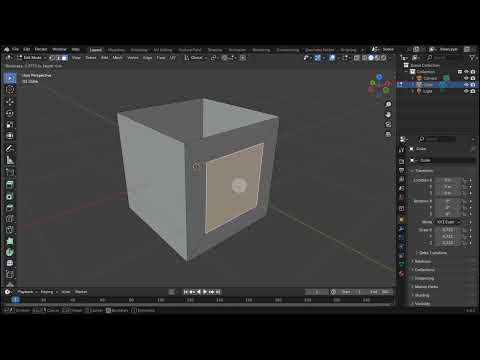

16. 1 Break the link, let faces think
Boundary option allows you to either include or exclude the edge with open faces. While in Inset Tool click B, to activate Boundary option any time.


16. 2 Inset neat, keep spacing sweet
Offset Even option allows you to have an even spacing around the insetted face


16. 3 Inset size, let faces decide
Offset Relative option allows you to have an non symmetrical spacing around the insetted face, where long sides will have more inset and short sides will have less inset. (That is why the option has relative in its name)


16. 4 Stay on track, no pulling back
Edge Rail option allows you to decide if you want the new extended edges to follow their own path or the one decided by the Inset Tool


16. 5 Wide or deep, its your command to keep
This is the main setting that allows you to set the Thickness of the inset or the the Depth of the inset. After activating Inset Tool with the help of Ctrl you can set the depth of the inset any time.


16. 6 Steep or low, set the Profile flow
Outset helps us in creating an extra boundary edge loop around the selected faces


16. 7 Steep or low, set the Profile flow
Select Outer option allows us to directly select the new faces, that were created after finishing the inset operation


16. 8 Steep or low, set the Profile flow
Individual option


16. 9 Steep or low, set the Profile flow
By setting the profile shape you can design the shape and flow of the beveled part, (make sure to give enough segments to see any visible changes)
Knife


17 Slice and dice & get the models precise
Click K, in the edit mode to activate Knife Tool. With the help of this tool you can create extra cuts.


17. 1 Slice, snap, cut, or glide - so many tools, fotr you to decide
With lots of options just a click away you can activate different options on the fly, just make sure to remember the shotcut keys, that will activate the options (some key have multiple options)
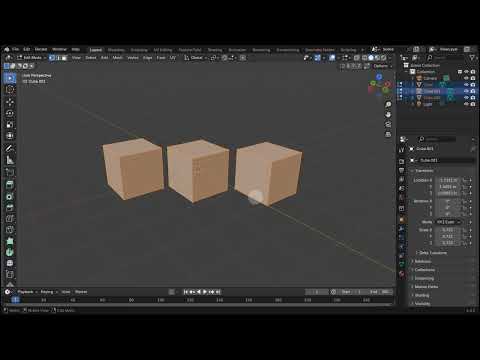

17. 2 Cut with care, touch only what's there
With Only Selected option, you can put cuts on only the selected parts and ignore the unselected parts
Bisect


18 One clean slice that is precise and nice
Bisect Tool allows you to cut the model in exactly half, based on where you have put the cut
Extrude


19 With a simple move, watch the mesh improve
Extrude Tool allows you to create a new part of the selected face, edge or vertex. The shortcut key is E (this will work only after activating "Edit Mode")


19.1 If faces hide, flip the side!
Flip Normals allows you to flip the direction of the faces, if the face is red it will cause issue in final render and may not render properly, this option allows you to control the appeareance of the extruded faces in the final render


19.2 Fewer cuts, no ifs or buts
Dissolve Orthogonal Edges option allows you to either keep or remove the extra edges created after extruding a part


19.3 Nudge and shift, give it a lift
Move option allows you to independently ad precisely move the extruded part as per your need


19.4 Global or local, set the focal
Orientation option allows you to decide the way and direction in which you want the extruded mesh to be moved


19.5 One side flows, the other knows
Mirror Editing option allows you to repeat the extrude function applied to the opposite axis (X, Y, Z - Axix) "unfortunately" in its own way


19.6 Move one part, the rest takes heart
Porportional Editing option allows you to to gradually include an area along based on proportional size the extruded part
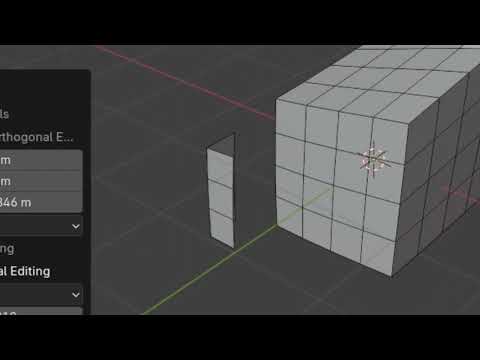

19.7 Move just one, but not everyone
Connected option allows you to apply the extrude to only that area which is only connected via edges. In short, this option allows you to either include or exclude a part of the mesh


19.8 On this plane, stay in the lane
Projected 2D option allows you to apply the extrude in an area (based on proportional size) from the angle which you are viewing it from
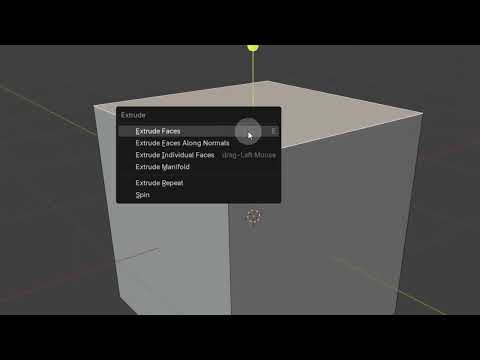

19.9 Extrude, refine, and realign—all options combine
The Alt+E menu in Blender provides various extrusion options for modeling, including
Extrude Region (moves faces together),
Extrude Along Normals (extrude along face normals), Extrude Individual Faces (separates face extrusions), Extrude Manifold (prevents internal faces), and
Extrude to Cursor (extrudes toward the mouse cursor).
It also includes Spin (circular extrusion) and Repeat (repeats the last extrusion), offering flexible ways to shape 3D geometry efficiently.
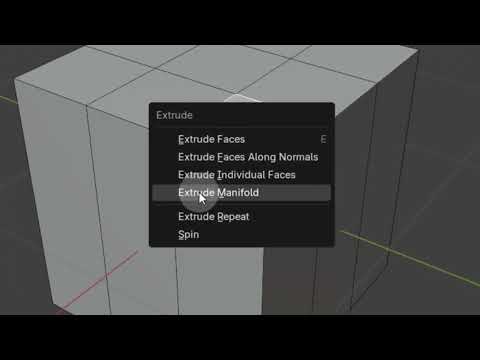

19.10 All connected, nothing neglected
The Extrude Manifold option in Blender's Alt+E menu extrudes selected geometry which is useful for creating complex shapes without generating internal faces or duplicate geometry.


19.11 Normals will guide, no need to hide
The Extrude Along Normals option in Blender's Alt+E menu extrudes multiple selected faces while maintaining their individual normal directions, allowing for even expansion or contraction. This is particularly useful for inflating or deflating surfaces without distorting their relative positions.
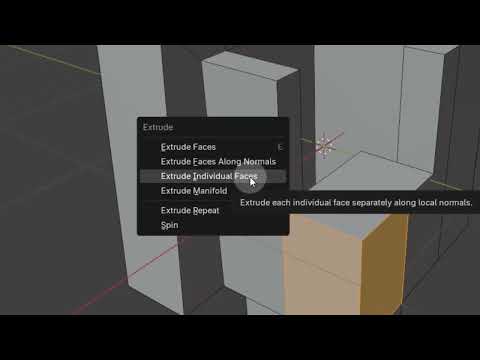

19.12 Individually done, but still so fun
The Extrude Individual Faces option in Blender's Alt+E menu extrudes each selected face separately along its own normal, rather than as a connected group. This is useful for creating panel-like structures or adding depth to multiple faces independently.


19.13 Move and click, make your choice is quick
The Extrude to Cursor option in Blender allows you to extrude selected geometry directly to the position of your mouse cursor in the 3D Viewport. This is useful for quickly shaping meshes by clicking to place extrusions at precise locations without manually moving them.
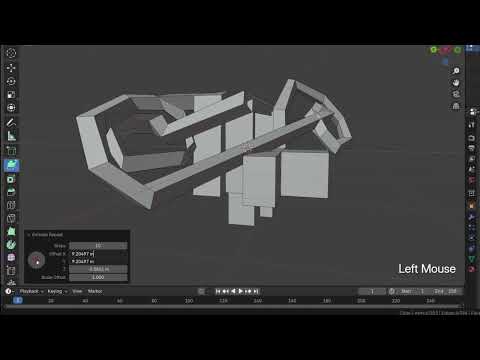

19.14 Same action, no distraction
The Repeat option in Blender's Alt+E (Extrude) menu repeats the last extrusion operation. It allows you to quickly create additional extrusions using the same parameters as the previous one, saving time for repetitive tasks.


19.15 Spin it around, watch it unbound
The Spin option in Blender's Alt+E (Extrude) menu allows you to extrude selected geometry in a circular arc around a specified axis, useful for creating curved or radial shapes. It works based on the 3D cursor's position and the view orientation, enabling controlled rotational extrusions.
© Copyright 2024 Pranay Vaidya.
All rights reserved.


